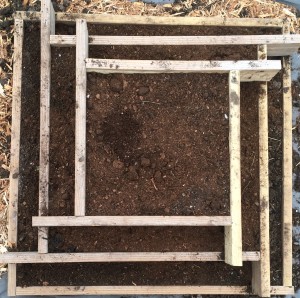
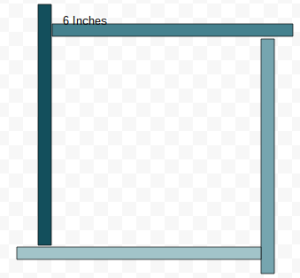
Here are the plans for the strawberry beds that we made. This spring we made three of these; however, I plan to continue to add more strawberry beds as we can.
Supply List
- 2 – 2″x 6″ x 12′ boards
- 2 – 2″x 6″ x 8′ boards
- 3″ screws (I used torque screws)
- Drill
- Carpenter’s Square, tape measure and pencil
Cutting List
- Cut both 12′ boards 30″, 30″, 42″ and 42″ lengths
- Cut both 8′ board into 48″, 48″ lengths
Giving you:
- 4 – 2″ x 6″ x 48″ boards
- 4 – 2″ x 6″ x 42″ boards
- 4 – 2″ x 6″ x 30″ boards
Assembly
Screw the 4-48″ boards in a square. (Make sure that it is square by using the carpenter’s square.) All boards will be on edge so that each tier is a 5 1/2″ deep. (They are called 2″ x 6″ but they are truly 1 1/2″ x 5 1/2″)
 The 42″ boards will make up the second tier. Each board is connected 6″ from the end of the previous board. Again make sure to use the carpenter’s square to get it square so that it will fit properly.
The 30″ boards are the third tier. They are assembled the same was as the 36″ boards.
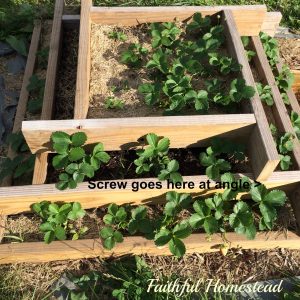
This is an assembled bed:
After the tiers are stacked on top of each other, I put a screw in at an angle at each place where a tier is on top of the tier below to make sure that it was stable.
I used weed barrier under the beds and then filled them with a compost and peat moss mixture and planted strawberries in them.
Blessings,
Jennifer
I realized after I initially published this that I had put the wrong measurement in for the second tier. I hope that I caught my mistake before I caused anyone to cut the wrong lengths. If not I am truly sorry!!


Awesome! Thanks for sharing!
What kind of wood are your boards? Do you worry about them rotting in a couple years?
I used pressure treated lumber. They should last for several years.